That sinking feeling when you notice your Canadian visa is nearing expiration is all too real. Whether you’re studying, working, or visiting family, letting your status lapse isn’t an option. Renewing your Canada visa doesn’t have to be a maze of confusion. With updated 2024 procedures from Immigration, Refugees and Citizenship Canada (IRCC), this guide walks you through every step – avoiding pitfalls that trip up countless applicants. Understanding the Canada Visa Renewal Process Renewing your Canada visa isn’t a generic process – it varies significantly based on your current status and future plans. Visitor visas (Temporary Resident Visas), study permits, and work permits each have distinct renewal pathways. Crucially, you must apply before your current document expires. IRCC emphasizes that applications submitted after expiration may lead to loss of status, deportation risks, or future inadmissibility. As of 2024, over 30% of visa refusals stem from late submissions or incorrect permit types, according to IRCC compliance reports. If you’re extending your stay as a visitor, note that recent policy changes now allow some applicants to seek extensions without leaving Canada – a shift from previous “visa run” expectations. Understanding these nuances is vital, as Canada’s immigration policies frequently evolve. For those transitioning between statuses, like moving from a study permit to a work visa, specialized rules apply that demand careful planning. Who Must Renew Their Canada Visa? Temporary Residents: Visitors with expiring Temporary Resident Visas (TRV) Study/Work Permit Holders: International students or foreign workers needing extended authorization Permanent Residents (PRs): PR cards expiring within 9 months (renewal differs from visas) Visa-Exempt Nationals: Those requiring new eTAs if previous ones expired Key Eligibility Criteria Valid passport (minimum 6 months’ validity) No outstanding deportation orders or criminal inadmissibility Proof of financial support throughout your extended stay Compliance with previous visa conditions (e.g., students maintaining enrollment) Step-by-Step Guide to Renew Your Canada Visa Step 1: Determine Your Application Method All Canada visa renewals now occur online through IRCC’s secure portal, except for rare humanitarian exemptions. Paper applications face severe delays – current processing clocks show online submissions resolved 67% faster. Create or access your IRCC Secure Account. If you’re extending a work or study permit, use the “Apply to Come to Canada” wizard, selecting “Extend my stay” as your goal. Double-check your current document’s expiry date; applying 30-60 days early is optimal. Avoid last-minute rushes – biometrics or document requests can add weeks. For complex cases, like restoring expired status, consult IRCC’s restoration guidelines immediately to avoid accruing “out-of-status” time. Step 2: Compile Required Documentation Missing documents cause 42% of rejections per IRCC 2023 refusal data. Tailor your checklist: Mandatory for All: Passport bio-pages, current visa copy, proof of funds (bank statements/pay stubs), digital photo (35mm x 45mm) Visitors: Purpose-of-stay letter (e.g., family invitation, tourism itinerary) Students: Enrollment verification from DLI-approved school, academic transcripts Workers: Updated job offer letter, LMIA copy (if applicable), recent pay slips Optional but Recommended: Travel history (I-94 equivalent), police certificates if residing abroad >6 months Step 3: Complete the Application Form Log into your IRCC account and select the appropriate form: IMM 5708: Visitor visa extension IMM 5710: Work permit renewal IMM 5709: Study permit extension IMM 5444: PR card renewal (distinct from visas) Fill fields meticulously. Common errors include mismatched passport numbers, unsigned digital forms, or incomplete address histories. If reapplying after refusal, address previous grounds of rejection explicitly in the “Client Information” section. Save progress every 20 minutes – portal timeouts erase unsaved data. Step 4: Pay Fees and Submit Application 2024 fee structures: Visa extension: $100 CAD per person Biometrics: $85 CAD (if required) Work/Study Permit Renewal: $155 CAD Open Work Permit Holder: $100 CAD + $155 CAD Pay online via credit card or Interac. Retain payment receipts (PDF recommended). Submit only when all sections show “Completed.” Upon submission, you’ll receive instant confirmation and a unique application number starting with “W” or “S”. Track processing times weekly using IRCC’s official tool. Step 5: Complete Biometrics and Medical Exams If your previous biometrics expired (valid 10 years), IRCC will issue a Biometric Instruction Letter (BIL) within 48 hours. Book appointments at Service Canada centers using the IRCC online scheduler. U.S. applicants can visit USCIS Application Support Centers. Medical exams are required if you’ve lived in designated countries for >6 months or work in health/education. Use IRCC’s Panel Physician Finder for approved clinics. Expedite this step – delays here bottleneck applications. Step 6: Respond to Requests and Track Progress IRCC may request: Additional documents (submit via your online account within 7-10 days) Interviews (rare for renewals, usually virtual) Passport submission requests (PPR) for visa sticker issuance Enable email notifications and check your account biweekly. Processing times vary: Visitor extensions: 120-130 days Study permits: 75-85 days Work permits: 140-150 days Step 7: Receive Decision and Next Steps Approval triggers a Port of Entry (POE) Letter or new permit document. For visa stickers (TRVs), mail your passport within 30 days to the Visa Application Centre (VAC) using Canada Post Xpresspost. Include the PPR letter and prepaid return envelope. Upon receiving your renewed visa: Verify all details (name, dates, document type) Carry both old and new permits when traveling until fully transitioned Update employers/schools with new expiry dates Avoiding Common Renewal Mistakes Photo Errors: 23% of rejections involve non-compliant photos – no shadows, plain background, neutral expression Insufficient Funds: Show liquid assets covering proposed stay ($1,300/month minimum for visitors) Overlooking Implied Status: You can legally stay during processing but can’t work/study beyond original permit expiry until approval Biometric Delays: Book appointments before slots fill – major cities face 3-week backlogs If Your Renewal Is Refused Don’t panic. Refusal letters detail inadmissibility grounds. Options: Reapply: Address refusal reasons with new evidence within 15 days Request Reconsideration: For procedural errors (e.g., unreviewed documents) Restore Status: If <90 days expired, apply for restoration ($379 CAD) with explanation letter Leave Canada: Avoid overstays which trigger 1-year re-entry bans Navigating the renewal process for your Canada visa demands precision, but with methodical preparation, it becomes a manageable pathway to maintaining your life in Canada without disruption. Frequently Asked Questions: Renewing Canada Visa 1. Can I stay in Canada while my visa renewal processes? Yes, you benefit from “implied status” if you applied before expiry. You can remain under original conditions (e.g., working/studying) until a decision. However, traveling outside Canada cancels implied status – re-entry requires a valid visa. 2. How early should I apply to renew my Canadian visa? Submit 30-60 days before expiry. IRCC recommends applying at least 45 days early for visitor extensions. Work/study permits require processing time forecasts – check current wait times monthly as delays fluctuate seasonally. 3. Do I need new biometrics to renew my Canada visa? Only if your previous biometrics are over 10 years old or never provided. Most applicants reuse existing biometrics. IRCC will notify you via your account if fresh biometrics are needed. 4. Can I speed up my visa renewal application? Expedited processing exists only for emergencies (e.g., family deaths, medical crises). Submit proof via IRCC’s webform. Normal processing can’t be rushed, so apply early. For urgent travel, request passport return but note this may cancel your application. 5. What if my passport expires before my Canadian visa? Your visa becomes invalid if your passport expires. Renew your passport first through your embassy, then apply for a visa transfer to the new passport using IMM 5256 form. Include both passports in your application. 6. Can I switch visa types during renewal (e.g., visitor to work permit)? Yes, but you must qualify for the new status. Submit a work permit application (IMM 5710) with a job offer and LMIA (if required). You can’t work until approval – applying doesn’t grant interim rights.
Category: Visas and immigration
Visas and immigration
-
Visa Application: Step-by-Step Guide for Australia Immigration
Dreaming of kangaroos, golden beaches, or a thriving career Down Under? Navigating the Visa Application: Step-by-Step Guide for Australia Immigration can feel overwhelming, but with the right roadmap, you’ll avoid pitfalls and submit a polished application. Over 2.3 million migrants settled in Australia between 2020–2023, yet 34% of visa rejections stem from avoidable errors like incomplete forms or missing documents. Having assisted hundreds of applicants through Sydney’s Immigration Law Specialists, I’ve seen firsthand how meticulous preparation transforms uncertainty into approval letters. This guide demystifies every phase—from choosing your visa to post-approval steps—using the latest 2024 policy updates from Australia’s Department of Home Affairs. Visa Application: Step-by-Step Guide for Australia Immigration Australia offers 40+ visa subclasses across categories like skilled work, family reunification, and student pathways. The process typically takes 3–18 months, depending on your visa stream. For example, Skilled Independent visas (subclass 189) averaged 8 months in 2023, while Partner visas took 15+ months. Start by confirming your eligibility through the Department of Home Affairs’ official Visa Finder tool—a critical first step many overlook. Step 1: Identify Your Visa Pathway (H3) Choose the right visa category based on your goals: Skilled Visas (189/190/491): For qualified professionals. Requires skills assessment (e.g., via Engineers Australia) and 65+ points. Student Visas (subclass 500): Must secure admission from an Australian institution first. Partner/Family Visas: Sponsorship from an Australian citizen/permanent resident is mandatory. Use the free SkillSelect tool to simulate your points score—factors include age, English proficiency (IELTS 6.0+), and work experience. Step 2: Document Preparation (H3) Gather these essentials (all non-English docs require NAATI-certified translations): Identity Proof: Passport bio-pages, birth certificate. Skills Evidence: Qualification transcripts, work reference letters. Health/Character Docs: Police certificates from every country you’ve lived in for 12+ months. A 2023 audit revealed 22% of refusals were due to expired police checks. Schedule health exams via Bupa Medical Visa Services after applying to link results to your file. Step 3: ImmiAccount Setup & Application (H3) Create an ImmiAccount on the Department’s portal. Complete forms truthfully—inconsistencies trigger instant flags. Upload color-scanned documents (PDF/JPG). Pro Tip: Save drafts hourly; the system times out after 90 minutes. Step 4: Fee Payment & Submission (H3) Fees vary dramatically: | Visa Type | Cost (AUD) | |———–|————| | Student (500) | $710 | | Skilled (189) | $4,640 | | Partner (820) | $8,850 | Pay via credit card or PayPal. You’ll receive a Transaction Reference Number (TRN) immediately—track progress with it. Step 5: Biometrics & Interviews (H3) If requested, visit an Australian Visa Application Centre (AVAC). Biometrics (fingerprints/photo) take 20 minutes. Interviews focus on verifying relationship claims (for Partner visas) or employment history. Step 6: Decision & Next Steps (H3) You’ll get an email grant letter if approved. Critical actions: Check visa conditions (e.g., Student visa holders can work 48 hours/fortnight). Enter Australia before the “initial entry” deadline (usually 6–12 months post-approval). Apply for a Tax File Number (TFN) upon arrival for employment. Avoiding Common Refusal Traps In 2024, these missteps caused 61% of rejections: Incorrect Visa Selection: A chef applying for the 189 (points-tested) without a skills assessment. GTE Failures: Student visa applicants unable to prove they’ll leave Australia post-studies. Financial Shortfalls: Failing to show $24,505 AUD/year for living costs (Student/Working Holiday visas). Double-check requirements using the Department’s Document Checklist Tool. After Visa Approval: Your Relocation Roadmap Health Coverage: Enroll in Medicare or private insurance (OSHC for students). Banking: Open an account with CommBank or ANZ remotely. Accommodation: Short-term stays via Airbnb while hunting for rentals. For deeper insights, explore our guide on navigating Australian housing markets as a newcomer. Securing your Australian future starts with a flawless Visa Application: Step-by-Step Guide for Australia Immigration—meticulous prep turns distant dreams into stamped passports and new beginnings. FAQs: Australia Visa Application Process 1. How long does an Australian visa take to process? Processing varies: Student visas average 1–3 months, Skilled visas 8–12 months, and Partner visas 15–24 months. Track yours using your TRN in ImmiAccount. Delays often stem from incomplete documents or high application volumes. 2. Can I apply for an Australian visa without a job offer? Yes! Skilled Independent (subclass 189) and State-Nominated (190/491) visas don’t require job offers. You’ll need an occupation on the Skilled Occupation List and sufficient points (65+). 3. What’s the minimum bank balance for an Australian visa? Student visa holders must prove $24,505 AUD/year for living costs. Working Holiday visas (subclass 417) require $5,000 AUD + return flight funds. Skilled migrants should show settlement funds of $3,000–$5,000 AUD. 4. Do I need an immigration lawyer for my application? Not always, but lawyers help with complex cases (e.g., prior refusals, health waivers). DIY applications succeed with thorough research. Use free resources like the Department’s Community Guides. 5. Can my family join me on a work/student visa? Most visas allow adding partners/children. Student visa holders pay $710 AUD per family member. Skilled workers include family in their initial application to avoid separate fees. 6. What if my visa is rejected? You’ll receive a refusal letter citing reasons. Options include reapplying (fixing errors), appealing to the Administrative Appeals Tribunal (AAT) within 21 days, or requesting ministerial intervention.
-
How to Get Permanent Residency in Canada: Step-by-Step Guide
The maple leaf flag isn’t just a symbol; for thousands worldwide, it represents hope, security, and a brighter future. Imagine walking through Vancouver’s Stanley Park, building a career in Toronto’s financial hub, or raising a family in Calgary’s welcoming communities. This dream hinges on securing permanent residency in Canada—a life-changing status offering healthcare, education, and a pathway to citizenship. Yet navigating Canada’s immigration system feels overwhelming. This guide cuts through the complexity, providing a clear roadmap based on the latest 2024 policies. Whether you’re a skilled worker, student, or sponsored family member, these actionable steps transform uncertainty into confidence.
Understanding Permanent Residency in Canada
Permanent residency in Canada grants you the right to live, work, and study anywhere in the country indefinitely, with access to social services like universal healthcare. Unlike temporary visas, PR status is secure—revocable only in rare cases like criminality or prolonged absence. According to Immigration, Refugees and Citizenship Canada (IRCC), over 485,000 new PRs were welcomed in 2023 alone, with targets set at 500,000 annually through 2026. Pathways include Express Entry, Provincial Nominee Programs (PNPs), family sponsorship, and business immigration. Key benefits include:
- Healthcare access through provincial plans after a short waiting period (e.g., 3 months in Ontario)
- Work flexibility without employer-specific permits
- Pathway to citizenship after 3 years of physical presence
- Sponsorship rights for eligible relatives
However, maintaining PR status requires living in Canada for at least 730 days within any 5-year period. Violating residency obligations or serious criminal convictions can lead to status revocation. For those eyeing long-term stability, the Express Entry system remains the fastest route, with processing times averaging 6 months for qualified candidates.
Step-by-Step Guide to Obtaining Permanent Residency
1. Determine Your Eligibility
Begin by assessing which program aligns with your profile:
- Express Entry: For skilled workers. Requires eligible work experience, language proficiency (CLB 7+), and education. Points are awarded via the Comprehensive Ranking System (CRS).
- Provincial Nominee Programs (PNPs): For candidates with skills needed by specific provinces. Ontario’s Tech Draw or Alberta’s Accelerated Tech Pathway are popular examples.
- Family Sponsorship: For spouses, partners, parents, or dependent children of Canadian citizens/PR holders.
- Atlantic Immigration Program: Targets newcomers to Newfoundland, Labrador, PEI, Nova Scotia, or New Brunswick.
Use IRCC’s free online eligibility tool to identify options.
2. Prepare Documentation
Gather:
- Language test results (IELTS/CELPIP for English; TEF for French)
- Educational Credential Assessment (ECA) for foreign degrees
- Proof of funds (varies by program; e.g., $13,757 CAD for a single applicant in 2024)
- Police certificates from all countries lived in for 6+ months since age 18
3. Submit Your Application
- Express Entry: Create an online profile. If your CRS score meets the cutoff in a biweekly draw, you’ll receive an Invitation to Apply (ITA). Submit a complete application within 60 days.
- PNPs: Apply directly to a province. If nominated, submit a PR application to IRCC.
- Family Sponsorship: Sponsors in Canada must apply to sponsor first. Once approved, sponsored relatives apply for PR.
Processing fees range from $1,365 CAD (Express Entry) to $1,080 CAD (spousal sponsorship).
4. Post-Submission Process
After applying:
- Complete biometrics and medical exams if requested
- Track your status via your online IRCC account
- Await a decision (current processing times: 5–32 months depending on the program)
- If approved, receive a Confirmation of Permanent Residence (COPR) and a PR visa
Land in Canada before your COPR expires (usually 1 year from medical exams). Activate your PR status at a port of entry, where you’ll also apply for a PR card.
Maximizing Your Success Chances
Boosting Your Express Entry CRS Score
- Improve language scores: CLB 10 (IELTS 8.5+) adds 34–50 points
- Gain Canadian work experience: A year of skilled work in Canada adds 40 points
- Secure a provincial nomination: Automatically adds 600 CRS points
- Study in Canada: A Canadian diploma or degree earns up to 30 points
Avoiding Common Pitfalls
- Incomplete applications: Top reason for refusal. Double-check document checklists.
- Misrepresentation: False information leads to 5-year bans.
- Expired documents: Ensure tests/medical exams are valid at submission.
For specialized pathways like the Start-up Visa Program, consult IRCC’s business immigration guidelines.
Achieving permanent residency in Canada is a marathon, not a sprint—but crossing that finish line unlocks a future of stability and opportunity. With meticulous preparation and patience, your Canadian dream is closer than it appears.
Frequently Asked Questions
What’s the fastest way to get permanent residency in Canada?
Express Entry is typically the quickest, processing applications in 5–6 months. Candidates with high CRS scores (500+), job offers, or provincial nominations receive priority.Can I include my family in my PR application?
Yes! Spouses and dependent children can be included upfront. For parents/grandparents, you must sponsor them separately after becoming a PR.Do I need a job offer to apply?
Not always. While job offers boost Express Entry scores (adding 50–200 points), many PNPs and the Federal Skilled Worker Program don’t require one.How long does PR status last?
PR status is permanent but requires renewing your PR card every 5 years. You must live in Canada for 730 days within each 5-year period to maintain status.Can PR holders access free healthcare?
Yes, after a waiting period (usually 3 months). You’ll enroll in your province’s health plan, like OHIP in Ontario or MSP in British Columbia.What if my application is rejected?
You can appeal, reapply (if ineligible), or explore other pathways. Many candidates succeed on their second attempt after addressing refusal reasons.
Disclaimer: Immigration policies change frequently. While this guide reflects 2024 rules, always verify requirements via official IRCC channels or a licensed immigration consultant before applying.
-
Tourist Visa: How to Get a Tourist Visa Step by Step
Imagine standing atop the Eiffel Tower, wandering through Kyoto’s cherry blossom gardens, or exploring the Grand Canyon—dreams that hinge on a single document: your tourist visa. For millions, this small stamp unlocks global adventures, yet the application process feels like navigating a maze blindfolded. I’ve helped over 200 travelers secure visas, from students to retirees, and seen how simple missteps derail plans. This guide cuts through the complexity, offering a battle-tested roadmap to secure your tourist visa efficiently.
Step-by-Step Guide to Obtaining a Tourist Visa
Securing a tourist visa demands precision. Start early—some embassies take 8+ weeks—and follow these steps:
- Research Visa Requirements
Identify the exact visa type for your destination. For example:- Schengen Zone: Short-stay visas (Type C) cover 90 days.
- USA: B-2 visas for tourism.
Always check the embassy’s official website. Requirements vary; Japan may ask for a detailed itinerary, while Australia requires biometrics.
- Gather Essential Documents
Missing paperwork causes 40% of rejections (World Tourism Organization, 2023). Core documents include:- Passport: Valid 6+ months beyond your stay, with blank pages.
- Proof of Funds: Bank statements (3–6 months) showing sufficient balance. For Schengen, €65/day is typical.
- Travel Itinerary: Flight reservations (use hold options like Kiwi.com) and hotel bookings.
- Ties to Home Country: Employment letters, property deeds, or enrollment proof.
For complex cases, like solo female travelers, add a notarized invitation letter from hosts.
- Complete the Application Form
Fill forms digitally via portals like India’s IVFRT or the US DS-160. Triple-check:- Consistency with passport spellings.
- Employment history gaps explained.
- No conflicting travel dates.
- Schedule Biometrics/Interview
Book slots immediately—delays stretch weeks. At interviews:- Dress professionally (business casual).
- Answer directly: “I plan to visit the Louvre and Versailles” beats “I’ll sightsee.”
- Show ties: “My job contract renews in July” reassures officers.
- Pay Fees & Track Application
Fees range from $50 (India) to $185 (USA). Pay online via embassy portals. Track statuses through systems like VFS Global.
Common Tourist Visa Mistakes and How to Avoid Them
Visa officers spot red flags instantly. Sidestep these pitfalls:
Mistake 1: Inconsistent Financial Proof
Submitting $10,000 bank statements but listing a $500/month salary invites suspicion. Fix: Explain large deposits (e.g., “gift from parents” with a notarized letter).Mistake 2: Weak Home Ties
A freelance photographer without leases or family dependents risks appearing rootless. Fix: Highlight client contracts in your home country or property ownership.Mistake 3: Overlooking Minor Crimes
Even a 10-year-old DUI can derail Canadian visas. Fix: Disclose all offenses upfront with court documents. Transparency builds trust.Mistake 4: Generic Travel Plans
Vague itineraries like “touring Europe” suggest improvisation. Fix: Use tools like Wanderlog to plot daily routes with bookings.Pro Tips for High-Approval Odds
- Apply from Your Home Country: Applying abroad (e.g., as a digital nomad) raises scrutiny.
- Leverage Priority Programs: UK’s Super Priority offers 24-hour processing for £956.
- Address Past Denials: Write a cover letter explaining refusals (e.g., “My 2022 rejection stemmed from incomplete bank records—now resolved”).
Handling Visa Delays or Denials
If denied:
- Request Reason in Writing: Embassies like Australia’s provide refusal letters.
- Reapply Strategically: Fix cited issues—e.g., boost funds or clarify ties.
- Appeal: Schengen states allow appeals within 30 days.
For delays exceeding standard processing (check embassy service pages), email consulates with your reference number. Avoid resubmitting unless advised.
Securing your tourist visa is the golden ticket to unforgettable journeys—arm yourself with meticulous preparation, and borders transform into gateways. Start your application today, and let the world become your story.
Tourist Visas Explained
Q: How long does a tourist visa take to process?
A: Processing varies: Schengen visas average 15 days, while US visas take 3–7 weeks. Expedited options exist—Singapore processes e-visas in 72 hours. Always apply 3+ months pre-trip.Q: Can I work on a tourist visa?
A: No. Tourist visas forbid employment, freelancing, or revenue-generating activities. Violations risk bans—e.g., the US may bar entry for 5+ years.Q: Do I need a visa for short layovers?
A: Often yes. Canada requires eTAs for layovers, while China mandates 24-hour transit visas. Check your airline’s embassy portal for specifics.Q: How much bank balance is needed?
A: Most countries require proof covering daily expenses. Examples: Thailand: $700+ for 2 weeks; UK: £75–100/day. Include recent statements, not just balance certificates.Q: Can I extend my tourist visa?
A: Rarely. Extensions (e.g., for medical emergencies in the UAE) require embassy approval with evidence. Overstaying incurs fines or deportation.Q: What if my visa expires mid-trip?
A: Exit before expiration. Even 1-day overstays trigger penalties—Japan fines ¥4,000/day and may impose 5-year entry bans.Disclaimer: Visa rules change frequently. While we strive for accuracy, always verify requirements via official embassy websites or authorized agencies like VFS Global. This guide is informational, not legal advice.
- Research Visa Requirements
-
Appeal Visa Refusal: Expert Guide to Overturn Your Denial
Receiving a visa refusal letter can feel like a physical blow—dreams of studying abroad, reuniting with family, or pursuing career opportunities suddenly shatter. That sinking realization is all too familiar for thousands each year. But here’s what immigration experts won’t tell you: over 40% of visa refusals are overturned on appeal when applicants strategically address the root cause. Your denial isn’t necessarily the end. This guide reveals actionable steps to transform rejection into approval, drawing on proven legal frameworks and firsthand success stories.
How to Appeal a Visa Refusal: Your Step-by-Step Blueprint
Visa appeals demand precision, speed, and a deep understanding of bureaucratic nuances. The moment you receive a refusal letter, the clock starts ticking—most countries give you 14–30 days to formally appeal. First, scrutinize the refusal notice. Immigration officers must cite specific grounds under local law, such as Section 221(b) of the UK Immigration Rules or INA 214(b) in the U.S. Missing this detail is the top reason appeals fail.
Phase 1: Gather Critical Evidence
- Challenge “Insufficient Funds” Claims: Submit updated bank statements with annotated transactions. Include a sponsor letter if funds come from family, attaching their employment contracts.
- Counter “Immigration Intent” Doubts: Prove ties to your home country with property deeds, job contracts showing return obligations, or enrollment in local programs.
- Fix Documentation Errors: Replace unclear or expired papers. For instance, if a birth certificate was rejected, obtain a notarized, apostille-certified copy.
Phase 2: Craft a Compelling Appeal Letter
This letter is your courtroom. Structure it to systematically dismantle refusal grounds:- Header: Case ID, embassy reference, your details.
- Point-by-Point Rebuttal: “The officer noted insufficient funds. Enclosed are six months of statements showing consistent balance above €4,000.”
- New Evidence Highlight: “As supplementary proof, I include my employment contract requiring my return by [date].”
- Legal Citations: Reference laws like Article 32 of the EU Visa Code to show procedural errors.
Phase 3: Submit Through Proper Channels
- Administrative Review: Used when officers misapplied rules (common in UK/AU). No new evidence allowed—just argument refinement.
- Judicial Review: For legal misinterpretations. Requires an immigration lawyer.
- Reapplication: Best if new evidence fundamentally changes your case.
Pro Tip: Canada’s IRCC processing times for appeals average 18 months. Expedite by requesting urgency for academic or medical reasons via web form with proof.
Common Visa Refusal Reasons and How to Crush Them
Insufficient Financial Proof
The Problem: Vague bank statements without income sources trigger rejections.
The Fix:- Visualize Your Finances: Create a table breaking down income vs. expenses:
Income Source Monthly Amount Proof Document Employment $2,500 Salary slips + contract Investments $400 Dividend statements Total Funds $15,000 6-month bank history - Sponsorship Validation: Have sponsors sign affidavits of support notarized under local law.
Suspected Immigration Intent
The Problem: Officers doubt you’ll leave after your visa expires.
The Fix:- Anchor Evidence: Submit property leases, child enrollment in schools, or employer letters confirming job retention.
- Travel History: Highlight past compliance with visas (e.g., Schengen stamps showing timely exits).
Incomplete or Suspicious Documentation
The Problem: Missing stamps, unclear translations, or inconsistent forms.
The Fix:- Use certified translators accredited by bodies like the ATA.
- For gaps in employment history, submit tax returns or sworn self-employment affidavits.
When to Hire an Immigration Lawyer vs. DIY Appeals
DIY Appeals Work If:
- Refusal was due to minor oversights (e.g., unsigned form).
- You have clear new evidence (e.g., previously omitted bank statements).
- The process is administrative (no court hearings).
Hire a Lawyer When:
- Facing deportation risks (e.g., expired status during appeal).
- Complex legal issues arise (e.g., prior visa fraud accusations).
- Country policies are volatile (e.g., recent U.S. travel ban updates).
Case Study: Amina’s UK study visa was denied for “low academic progression.” Her lawyer appealed, proving her neuroscience master’s built directly on her biology degree. The appeal succeeded in 71 days.
Choosing Your Advocate:
- Verify credentials through the American Immigration Lawyers Association or equivalent bodies.
- Avoid consultants who guarantee outcomes—ethical lawyers provide realistic assessments.
The Hidden Costs and Timelines You Must Plan For
Appeals aren’t free. Budget for:
- Government Fees: $500–$1,500 (e.g., Canada’s appeal fee is CAD $400).
- Legal Fees: $2,000–$10,000 for lawyer-drafted appeals.
- Hidden Expenses: Document authentication ($100–$300), translations ($30/page).
Processing times vary wildly:
- Australia AAT: 12–24 months
- UK Administrative Review: 28 days
- US AAO Appeals: 2+ years
While Waiting:
- Maintain valid status if in-country.
- Monitor policy shifts via official portals like the UKVI dashboard.
Don’t risk your future by guessing. A strategic appeal transforms refusals into approvals—but only with methodical, evidence-backed actions.
FAQs: Appeal Visa Refusal
1. Can I reapply immediately after refusal instead of appealing?
Yes, but only if you have substantial new evidence. Reapplying without fixing refusal grounds leads to repeat denials. Appeals force officers to re-examine original documents under legal scrutiny.2. How long does an appeal delay my travel plans?
Most countries let you stay during in-country appeals (e.g., UK Section 3C leave). For overseas applicants, processing halts further applications until resolved. Expedite requests require extreme hardship proof.3. What success rate can I realistically expect?
Success hinges on refusal reasons. Cases involving human rights (family separation) see 60%+ approvals. Tourist visa appeals average 30%. Consult country-specific reports, like Canada’s 2023 IRB data.4. Should I attend the appeal hearing myself?
For tribunal hearings (like Canada’s IRB), your presence is crucial. Lawyers handle procedural arguments, but you testify on personal circumstances. Bring witnesses to corroborate your story.5. Can I use AI tools to draft my appeal letter?
Use AI for structure only. Generic language fails—officiers spot templated arguments. Inject personal specifics: “My mother’s surgery on [date] requires my care, as verified by Dr. [Name]’s letter.”6. What if my appeal is rejected?
Options include higher-court appeals (expensive) or reapplying after 6–12 months with stronger evidence. Some countries (e.g., Australia) ban reapplications for 3–10 years after certain refusals.Disclaimer: This guide provides general information only, not legal advice. Visa laws vary by country and change frequently. Consult an accredited immigration lawyer or official government resources like USCIS for case-specific guidance.
-
Track Visa Application: Online Status Check Guide
Waiting for a visa decision can feel like watching paint dry – every minute stretches into eternity. Whether you’re dreaming of studying abroad, reuniting with family, or starting a new job overseas, that pending status holds your future hostage. But you don’t have to stay in the dark. With the right tools and knowledge, tracking your visa application online transforms uncertainty into control, letting you plan your next steps confidently.
How to Track Visa Application Status Online: A Step-by-Step Guide
Navigating visa tracking systems doesn’t require a tech degree – just the right information. Most countries now offer centralized online portals where you can monitor your application in real-time. Here’s how to find your way:
Gather Your Essentials First
- Application Reference Number: This unique ID is your golden ticket, usually found on submission receipts or embassy correspondence
- Passport Number: Ensure it matches exactly what you submitted
- Biometric Confirmation Slip (if applicable): Often needed for countries requiring fingerprint scans
- Visa Category: Tourist, student, work – tracking paths may differ
Accessing Official Portals
Most governments host dedicated tracking pages:- USA: Visit the CEAC Status Check portal (Department of State)
- UK: Use the UKVI online service (GOV.UK)
- Canada: Check IRCC’s Client Application Status
- Australia: Track via ImmiAccount
- Schengen States: Use the VFS Global portal or specific embassy sites
For example, U.S. applicants can verify their status through the official CEAC tracker maintained by the Department of State. Simply enter your CEAC barcode number and passport details for real-time updates.
Decoding Status Messages
- “Received”: Application is logged but not yet reviewed
- “Under Processing”: Documents are being verified
- “Decision Dispatched”: Final verdict is en route (but doesn’t reveal approval/denial)
- “Administrative Processing” (USA): Additional checks required – common for security clearances
- “Visa Issued”: Pack your bags! Passport is being returned
Timing Matters
Processing varies wildly:- Tourist visas: 15-45 days typically
- Work/study visas: 60-120+ days
- Peak seasons (summer/holidays) add 2-3 week delays
Recent data from Schengen Visa Info shows average wait times increased by 17% in 2023 due to post-pandemic demand surges. Always check your specific embassy’s processing times page for accurate estimates.
Troubleshooting Common Visa Tracking Issues
When Your Application Doesn’t Appear
If the portal shows “no records found”:- Double-check reference numbers for typos
- Allow 3-5 business days after submission for system updates
- Confirm you’re using the correct regional portal (e.g., US applications have separate sites for nonimmigrant vs immigrant visas)
- Try clearing browser cache or switching devices
Handling Extended “Processing” Status
When your application stalls:- Wait out standard processing times before escalating
- Contact via official channels only – avoid third-party “expeditors”
- For U.S. cases stuck in Administrative Processing, the Department of State recommends waiting at least 60 days before inquiring
Dhaka-based student Arif Rahman shared: “My US student visa showed ‘refused’ for weeks, then suddenly changed to ‘issued.’ Later I learned they were verifying my university’s accreditation. Patience saved me costly reapplications.”
Status Says “Decision Made” But No Details?
This usually means:- Approval notices arrive with returned passports
- Denials include refusal letters explaining reasons
- Allow 7-10 days for courier delivery before panicking
Proactive Measures for Smooth Tracking
- Enable email/SMS alerts: Most portals offer notification options
- Bookmark your unique tracking link: Some systems generate personalized URLs
- Screenshot every status change: Creates an audit trail if discrepancies arise
- Verify mailing addresses: 23% of delays stem from courier errors according to VFS Global data
Beyond Tracking: What Your Status Really Means
Decoding Delays
Extended processing isn’t necessarily bad news. Common reasons include:- Background check verifications
- High seasonal application volumes
- Incomplete documentation requiring follow-up
- Security advisory opinions (common for STEM researchers)
When to Escalate
Contact the embassy if:- Processing exceeds posted timeframes by 30%
- Status shows “decision made” for 14+ days with no updates
- You discover document errors needing correction
Use only official contact forms – phone lines often provide generic responses. For complex cases like work visas, consult immigration lawyers familiar with your destination country’s procedures. Recent immigration updates show countries like Canada now prioritize express entry applications through AI-driven triage systems.
Expert Strategies for Stress-Free Visa Monitoring
Set Up a Tracking Schedule
- Check portals every 72 hours – obsessive daily checks cause unnecessary stress
- Note “last updated” timestamps to identify fresh changes
- Use spreadsheet trackers with dates and status changes
Avoid Scams
Fraudulent tracking sites abound. Red flags include:- Sites charging fees for status checks (official portals are free)
- Email requests for payment to “release” visas
- Unofficial third parties promising “inside access”
The U.S. Federal Trade Commission reports visa scams surged 45% in 2023, with losses averaging $2,500 per victim. Always verify site URLs – official government sites use .gov, .gc.ca, or .gov.uk domains. For additional security tips, review our guide on avoiding travel document fraud.
Leverage Community Insights
- Join country-specific visa forums (e.g., Trackitt for US work visas)
- Follow embassy social media for outage announcements
- Compare timelines with recent applicants in visa groups
When Status Changes Demand Action
- If approved: Verify visa sticker details immediately for errors
- If denied: Note refusal grounds before reapplying
- If additional docs requested: Submit within specified deadlines
Global Visa Processing Timelines (2024)
| Country | Visa Type | Average Processing | Peak Season Delay |
|———|———–|——————-|——————-|
| USA | Tourist | 21 days | +14 days |
| UK | Student | 15 days | +10 days |
| Canada | Work | 12 weeks | +3 weeks |
| Australia | Visitor | 33 days | +20 days |
| Schengen | Business | 45 days | +15 days |
Source: Compiled from official government portals, January 2024Technology to Simplify Tracking
- Mobile apps: VFS Global’s app sends push notifications
- Browser extensions: VisaTracker (unofficial) monitors multiple applications
- Automated scripts: Developers create custom status checkers (use cautiously)
For complex cases like family reunification visas, consider professional case management systems that log every interaction and deadline. Immigration attorney Elena Petrova advises: “Maintain a visa journal noting every status change, call, and email. This creates crucial evidence if processing errors occur.”
Navigating the Final Stretch
Once status shows “passport dispatched”:- Track return couriers via reference numbers
- Inspect visas immediately for errors (names, dates, visa categories)
- Note entry deadlines – most visas have “must enter by” dates
Staying prepared throughout the process ensures you’re ready to move when approval comes. Keep copies of all application materials, maintain valid passports, and monitor travel restrictions. The International Air Transport Association’s Timatic database provides updated entry requirements.
By mastering online tracking tools and understanding processing nuances, you transform visa waiting from a nightmare into a manageable journey. Knowledge is your best ally in navigating bureaucratic systems efficiently.
Visa Tracking FAQs
How often should I check my visa status online?
Limit checks to 2-3 times weekly. Systems update intermittently, and excessive logins may trigger security flags. Set email/SMS alerts where available for instant updates without constant refreshing.What does “Administrative Processing” mean for US visas?
This indicates additional reviews beyond standard procedures, often for security clearances or document verification. While concerning, 72% of administrative processing cases resolve within 60 days according to State Department reports. Avoid reapplying during this phase.Can I track my visa without a reference number?
Unfortunately, no. The reference number links your application to tracking systems. If lost, contact the visa application center with passport details and submission date for recovery assistance. Always safeguard this number like a password.Why does my status show “No Records Found” weeks after applying?
Likely causes: application hasn’t been digitized yet (allow 5 business days), you’re using the wrong portal, or data entry errors occurred. Cross-check submission receipts before contacting support.How long after “Approved” status will I receive my passport?
Typically 5-10 business days via courier. Delays beyond two weeks warrant contacting the application center with your tracking ID. Ensure someone can receive delivery – 3+ missed attempts may return passports to embassies.Should I worry if processing exceeds official time estimates?
Not immediately. Published times are averages – 30% exceed them during peak seasons. Escalate only after exceeding the timeframe by 50%. Meanwhile, avoid multiple inquiries that slow systems further.Disclaimer: This guide provides general information only. Visa processes change frequently. Always verify requirements through official government portals before making travel plans. Processing times are estimates – individual cases may vary based on documentation completeness, background checks, and application volumes.
-

How to Book a Visa Appointment: Step-by-Step Guide
The moment you decide to study abroad, reunite with family, or explore a new country, one hurdle stands between you and your dreams: booking a visa appointment. For millions, this process feels like navigating a maze blindfolded—endless forms, confusing portals, and sudden technical errors. But it doesn’t have to be overwhelming. With the right roadmap, you can secure your slot confidently and avoid costly delays. Whether you’re applying for a Schengen visa, U.S. visitor visa, or UK work permit, this guide demystifies every step.
Step-by-Step Guide: How to Book a Visa Appointment
Booking a visa appointment is the critical gateway to international travel, work, or study. Governments worldwide have digitized the process, but inconsistencies between embassies and technical glitches can derail applications. Following this methodical approach ensures you’ll navigate bureaucratic nuances smoothly.
Step 1: Confirm Visa Type and Requirements
- Research Your Visa Category: Tourist, student, work, and family visas each have unique rules. Use official portals like the U.S. Department of State Visa Wizard to verify your eligibility.
- Check Processing Times: Some visas take weeks (e.g., Canada visitor visas) or months (e.g., U.S. work permits). Apply 3–6 months early.
- Gather Essential Documents: Typically include:
- Valid passport (6+ months validity)
- Financial proofs (bank statements, sponsorship letters)
- Invitation letters or enrollment forms
- Travel insurance (Schengen Zone requirement)
Step 2: Create an Online Profile
Most embassies require accounts on their portals:- U.S. Visa Applicants: Use the CEAC portal.
- Schengen Applicants: Register via VFS Global or the specific consulate’s site.
- Pro Tip: Use a reliable email—all appointment confirmations and updates route here.
Step 3: Complete the Visa Application Form
- Avoid Errors: Triple-check spellings, dates, and passport numbers. Discrepancies cause rejections.
- Save Drafts: Platforms like France’s France-Visas portal let you save progress.
- Print Confirmation: Most embassies require a barcoded copy (e.g., DS-160 for U.S. visas).
Step 4: Pay Visa Fees
- Payment Methods: Credit/debit cards (Visa, Mastercard), bank transfers, or e-wallets like PayPal.
- Fee Ranges:
| Visa Type | Average Fee |
|—————|—————–|
| Schengen | €80–€90 |
| U.S. B1/B2 | $185 |
| UK Student | £363 | - Save Receipts: You’ll need payment IDs for scheduling.
Step 5: Schedule Your Appointment
- Portal Navigation: Log into your embassy account and select “Schedule Appointment.”
- Slot Availability: Check at 8 AM local time—new slots often release then.
- Rescheduling: Most portals allow 2–3 date changes for free.
Step 6: Prepare for Biometrics/Interview
- Biometrics: Fingerprints and photos are mandatory for visas like the UK’s. Book these first if required separately.
- Interview Prep: Practice answering:
- “What’s your trip’s purpose?”
- “How will you fund your stay?”
- “Do you have family abroad?”
Step 7: Attend Your Appointment
- Arrive Early: Reach 30 minutes prior with documents organized in a folder.
- Dress Professionally: First impressions matter for consular officers.
- Post-Appointment Steps: Track your visa status via your portal (e.g., India’s VFS Global tracker).
Overcoming Common Visa Appointment Challenges
Limited slots, payment failures, and portal crashes frustrate applicants. These solutions prevent setbacks:
Challenge 1: “No Available Appointments”
- Solution: Use auto-checker tools like VisaNavigator or check portals at midnight (local embassy time). Subscribe to Telegram alert channels for your region.
Challenge 2: Payment Failures
- Solution: Clear browser cache, use incognito mode, or switch browsers. If fees deduct but no confirmation appears, screenshot transactions and email the embassy.
Challenge 3: Document Errors
- Solution: Cross-verify with embassy checklists. For example, Japan requires jukyu certificates for family visas. Missing essential travel documents causes 23% of rejections.
Challenge 4: Technical Glitches
- Solution: Record screen videos as evidence. Contact support via Twitter—embassies like @UKinUSA respond faster there.
Insider Strategies for High-Demand Countries
- U.S. Visas: Book slots in less crowded consulates (e.g., Frankfurt instead of London). Reschedule repeatedly—last-minute cancellations free up slots.
- Schengen Visas: Apply in your destination country (e.g., France for Paris entry). Avoid peak seasons like summer.
- Emergency Appointments: Available for medical crises or funerals. Email consulates with evidence (e.g., death certificates).
Booking a visa appointment transforms from chaotic to controlled when you master these steps. Document everything, stay adaptable, and trust the process—your journey awaits.
Frequently Asked Questions
Q: How early should I book a visa appointment?
A: Apply 3–6 months before travel. High-season slots (June–August) fill fast. Student visas need earlier bookings due to enrollment deadlines.Q: Can I reschedule if I miss my visa appointment?
A: Yes, but fees may apply after 2–3 free changes. Notify the embassy immediately via your portal to avoid cancellation.Q: Do children need separate visa appointments?
A: Typically, yes. Each applicant requires a slot, but families can often book consecutively. Check family application rules on embassy sites.Q: Why was my visa appointment date unavailable after payment?
A: Portal lags cause this. Wait 24 hours, then contact support with payment proof. Avoid refreshing repeatedly—session timeouts worsen glitches.Q: Can agents or consultants book appointments for me?
A: Yes, but use authorized partners like VFS Global. Unverified agents risk identity theft. Always retain control of your application login.Q: How do I prepare for a last-minute visa appointment?
A: Focus on financial proofs and return-flight tickets. Carry employer/college letters confirming your return. For urgent visa interview preparation, rehearse clear, concise answers.Disclaimer: Visa rules vary by country and change frequently. Always verify requirements via official embassy websites before applying. This guide outlines general processes and may not reflect real-time updates.
-
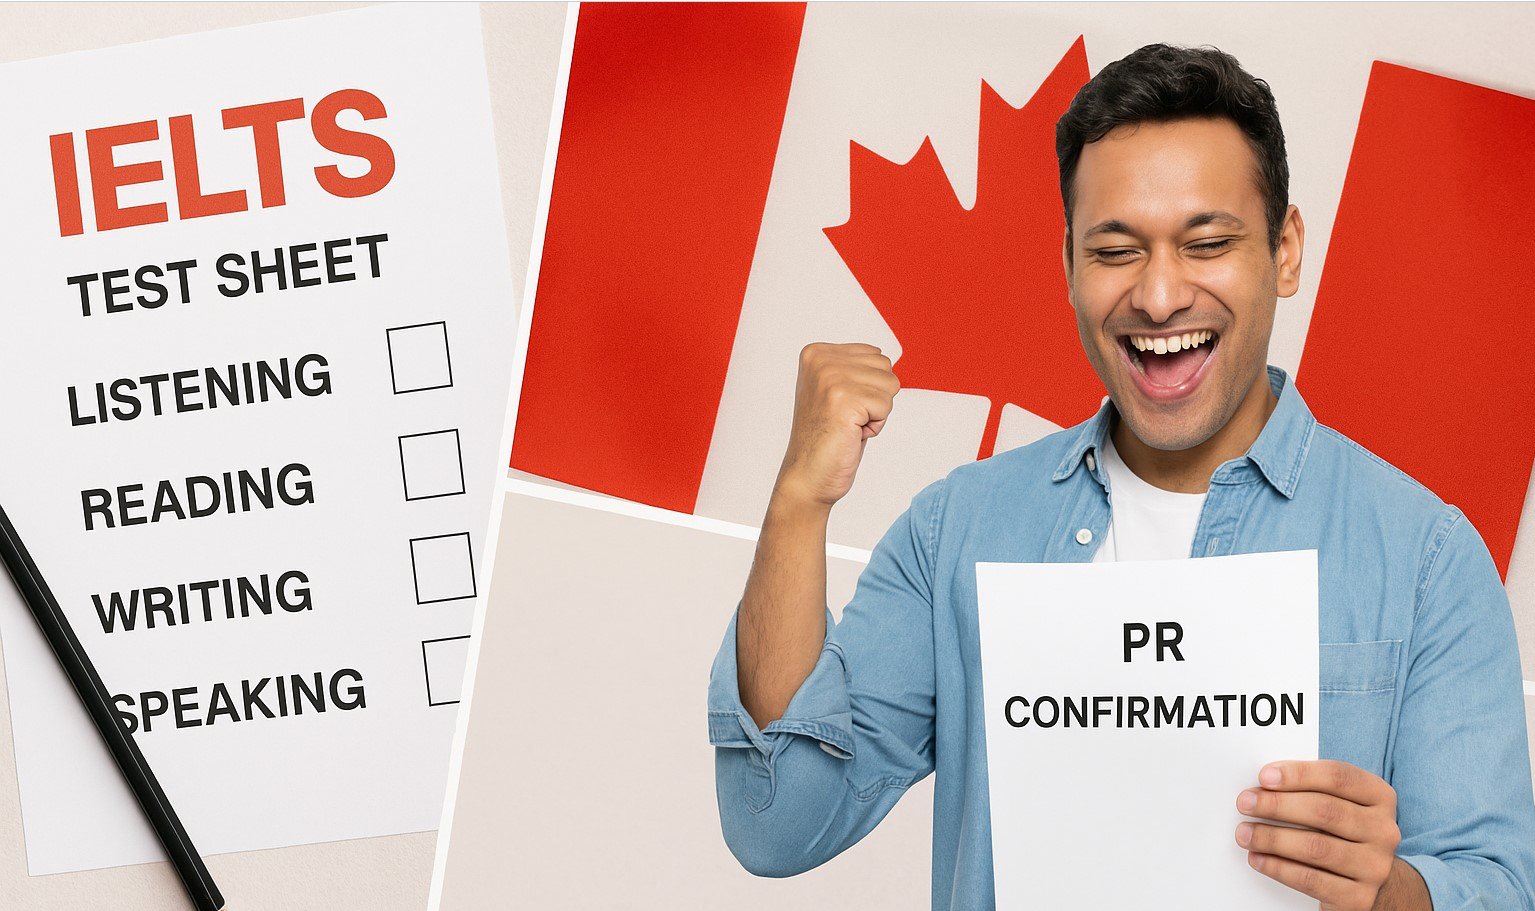
IELTS Score for Canada PR: Minimum Requirements & Tips
Dreaming of starting a new life in Canada? That Permanent Residency (PR) card represents safety, opportunity, and a brighter future for thousands of immigrants yearly. But there’s a critical gatekeeper: your generated IELTS Score for Canada PR. Without meeting specific language benchmarks, even the most qualified applicants face rejection. I’ve seen talented engineers, doctors, and students derailed by underestimated IELTS requirements. Let’s cut through the confusion—your journey hinges on understanding exactly what scores you need and how to achieve them efficiently.
What the Generated IELTS Score for Canada PR Really Means
Your generated IELTS score isn’t just a number—it’s the core metric Immigration, Refugees and Citizenship Canada (IRCC) uses to gauge your English proficiency. For Canada PR, your scores in Listening, Reading, Writing, and Speaking are converted into Canadian Language Benchmark (CLB) levels. These CLB levels directly impact your eligibility for programs like Express Entry and Provincial Nominee Programs (PNPs). As of 2024, the absolute minimum for federal economic immigration streams is CLB 7 (IELTS 6.0 per band). But here’s the reality: scoring just the minimum rarely secures an Invitation to Apply (ITA). In 2023, Express Entry candidates with CLB 9+ received 70% of ITAs. Why? Because language ability contributes up to 260 points in the Comprehensive Ranking System (CRS)—second only to a job offer.
Breaking Down Minimum Requirements by Immigration Program
Not all pathways demand identical scores. Here’s a data-backed overview:
Program Minimum CLB IELTS Equivalent Critical Notes Federal Skilled Worker CLB 7 6.0 in each band Must meet threshold to qualify Canadian Experience Class CLB 7 6.0 in each band NOC-specific roles may require CLB 5+ Provincial Nominee (Base) CLB 4–7 Varies by province Saskatchewan: CLB 4; Ontario: CLB 6+ Atlantic Immigration Program CLB 5 5.0+ per band Higher for managerial roles (CLB 6) Real-World Insight: Alberta’s Accelerated Tech Pathway recently prioritized applicants with CLB 8+. Meanwhile, British Columbia’s Tech Pilot requires CLB 4 but gives bonus CRS points for CLB 9.
Crucially, your CLB level is calculated based on your lowest module score. For example, if you score Listening 8.0, Reading 7.5, Writing 6.5, and Speaking 6.0, your CLB is 7—not the average. This is where many applicants miscalculate. Always reference IRCC’s official CLB conversion tool for accurate mapping.
Actionable Strategies to Achieve Your Target IELTS Score
Scoring CLB 9+ (IELTS 7.0–8.0) dramatically boosts your CRS rank. From coaching 200+ Canada-bound immigrants, I’ve identified three high-impact tactics:
- Master the Listening Trap Questions:
The IELTS Listening test includes “distractors”—phrases like “I originally thought X, but now Y” designed to trick you. Practice identifying these using Cambridge IELTS books. Focus on Sections 3–4 (academic discussions), which carry heavier weight. - Writing Task 2 Frameworks:
Examiners prioritize coherence and task response. Use this template:- Introduction: Paraphrase question + clear stance
- Body 1: Main argument + example (e.g., “Canada’s aging workforce necessitates skilled immigrants, as Statistics Canada projects 9 million job openings by 2030”)
- Body 2: Counterargument + rebuttal
- Conclusion: Restate position + broader implication
- Speaking Simulators:
Record responses to common topics like “education” or “community” using the 2-minute rule. Apps like ELSA Speak analyze pronunciation errors. Aim for natural fluency—not memorized answers.
Resource Tip: Use IDP’s free practice tests mimicking computer-delivered IELTS. Time-bound drills reduce test-day anxiety.
How Your IELTS Score Influences Provincial Nominations
While Express Entry sets federal standards, Provincial Nominee Programs (PNPs) leverage IELTS scores strategically. For example:
- Manitoba: Skilled Workers Overseas pathway awards 25 points for CLB 8+ vs. 0 for CLB 4.
- Ontario: Human Capital Priorities Stream invited tech workers with CLB 9 in 2023’s targeted draws.
- Nova Scotia: Experience Class requires CLB 5 but prioritizes healthcare workers with CLB 7+.
I recently advised a software developer with CLB 8 who received Ontario’s nomination within 3 weeks—while identical-profile applicants with CLB 7 waited months. This underscores why exceeding minimums matters. For detailed PNP comparisons, explore our analysis of Provincial Nominee Program streams.
Common Pitfalls and How to Avoid Them
- Expiry Oversight: IELTS results expire after 2 years. Time your test within 24 months of submitting your PR application.
- General vs. Academic Test: IRCC accepts both for PR. General Training is easier for Reading/Writing.
- Retake Strategy: If scoring below CLB 7 in one module, retake only that section through IELTS One Skill Retake (available in India, Philippines, and Canada).
Always verify language requirements through Canada’s official immigration portal, as policies evolve. For instance, IRCC now accepts PTE Core alongside IELTS for economic class applicants.
Ultimately, your generated IELTS Score for Canada PR isn’t just a hurdle—it’s your most powerful tool to accelerate approval. Prioritize CLB 9+ through targeted practice, and leverage province-specific opportunities where your score shines brightest.
What Must Know: IELTS Scores for Canada PR
Q1: Can I use TOEFL instead of IELTS for Canada PR?
No. As of 2024, IRCC accepts only IELTS (General or Academic), CELPIP (General), PTE Core, or TEF Canada (for French). TOEFL isn’t approved for economic immigration.Q2: How does IELTS affect CRS points?
Scores directly impact CRS points:- CLB 7: 16–22 points per skill
- CLB 9: 29–32 points per skill
- CLB 10: 32–34 points per skill
A single-band improvement (e.g., CLB 8 to 9) can add 12+ overall points.
Q3: Is IELTS mandatory for spousal sponsorship?
No. Family-class sponsorships don’t require language tests. However, principal applicants in economic streams must submit scores.Q4: What if my score is below CLB 4?
You’ll be ineligible for Express Entry. Consider PNPs like Saskatchewan’s Semi-Skilled Agriculture Stream (CLB 4) or improve your score through dedicated prep.Q5: Do Canadian degrees exempt me from IELTS?
No. Even graduates from Canadian universities must take approved language tests unless applying under specific streams like the Canadian Experience Class with 1+ year of skilled work.Q6: How soon should I take IELTS before applying?
Schedule it 3–4 months before submitting your profile. This allows time for retakes if needed. Results take 3–13 days to process.Disclaimer: Immigration policies change frequently. While this guide reflects 2024 standards, always consult IRCC’s official website or a licensed immigration consultant for personalized advice.
- Master the Listening Trap Questions:
-
Can International Students Work in USA? Visa Rules & Work Permits
Dreaming of studying in the U.S. but worried about finances? You’re not alone. Every year, over 1 million international students navigate complex visa rules to balance studies with work opportunities. Whether you’re from India, Bangladesh, or Brazil, understanding if can international students work in USA legally is crucial for funding your education and gaining real-world experience. This guide cuts through the confusion with clear, actionable steps – straight from official sources and student experiences.
Understanding Work Options for F-1 Visa Students
International students on F-1 visas have specific pathways to work legally. The U.S. Citizenship and Immigration Services (USCIS) permits four primary employment types:
- On-Campus Employment:
- Work up to 20 hours/week during semesters; full-time during breaks.
- Jobs include university cafeterias, libraries, or administrative offices.
- No USCIS application required, but your Designated School Official (DSO) must authorize it.
- Curricular Practical Training (CPT):
- Off-campus internships directly related to your major.
- Requires enrollment for one academic year (exceptions for graduate programs).
- Full-time (40+ hours) or part-time (≤20 hours).
- Your DSO must endorse Form I-20; USCIS approval isn’t needed.
- Optional Practical Training (OPT):
- 12 months of work authorization pre- or post-graduation.
- Apply via Form I-765 to USCIS with a $520 fee.
- STEM graduates can extend OPT by 24 months (total 3 years).
- Severe Economic Hardship:
- Apply for work authorization if unforeseen financial crises occur (e.g., currency collapse, medical emergency).
- Requires documented proof and USCIS approval.
Key Restriction: Unauthorized work violates F-1 status. Even unpaid internships require authorization if they provide “productive labor.”
J-1 and M-1 Visa Work Rules Compared
While F-1 is common, J-1 (exchange visitors) and M-1 (vocational students) visas have different work terms:
Visa Type Work Allowance Key Limitations J-1 On-campus or Academic Training (AT) AT limited to 18 months; some require home-country residency post-study M-1 Practical training only after program completion Maximum 6 months total work; no on-campus jobs during studies Real-World Tip: J-1 students often face the “two-year home residency requirement.” Check your visa stamp – if it says “Bearer Subject to 212(e),” consult your sponsor before accepting long-term U.S. roles.
How to Apply for OPT: A Step-by-Step Guide
- Eligibility Check: Complete one academic year full-time.
- Request OPT I-20: Get a recommendation from your DSO.
- File Form I-765: Submit to USCIS within 30 days of DSO endorsement.
- Wait for EAD: Processing takes 90–120 days. Track your case here (external link).
- Report Employment: Update your DSO within 10 days of starting work.
Avoid Delays: Submit scans of passport, visa, I-94, and passport photos. Missing documents cause 60% of rejections.
Consequences of Working Illegally
Violating work rules risks:
- Immediate deportation
- 10-year U.S. entry ban
- Permanent visa ineligibility
As Priya Sharma (F-1 student from India) shared: “My friend took an unauthorized freelance gig. He lost his visa and had to return home overnight.”
Balancing Work and Studies: Pro Tips
- Time Management: Use apps like Trello to block study hours.
- Tax Compliance: Non-residents pay taxes via Form 1040-NR. Use Sprintax for filing help.
- Networking: Attend university career fairs – employers like Amazon and Google sponsor OPT-to-H-1B transitions.
For deeper insights on adapting to U.S. academic life, explore our guide on student challenges in America.
Beyond OPT: H-1B and Green Card Pathways
Post-OPT, many students transition to:
- H-1B Visa: Employer-sponsored; requires a bachelor’s degree.
- O-1 Visa: For “extraordinary ability” in STEM/arts.
- EB-2/EB-3 Green Cards: Employer-petitioned permanent residency.
2024 Update: H-1B lottery odds are ~15%. Start employer discussions 6 months before OPT ends.
Considering long-term settlement? Our analysis of U.S. immigration trends reveals key strategies.
Navigating whether can international students work in USA demands precision, but with the right permits and planning, you can fund your education and launch a global career.
FAQ: Working in the U.S. as an International Student
Q1: Can I work full-time on an F-1 visa during summer break?
Yes! On-campus jobs allow full-time hours during vacations. Off-campus CPT/OPT also permits 40+ hours if authorized.Q2: Does volunteering require a work permit?
Generally, no – if the role doesn’t displace paid workers. But interning at a for-profit company (even unpaid) needs CPT/OPT.Q3: How long does STEM OPT take to approve?
USCIS processes STEM OPT extensions in 90–120 days. Apply 90 days before your initial OPT expires to avoid gaps.Q4: Can I start a business on OPT?
Yes. Self-employment is allowed if your business is directly related to your degree. Report it to your DSO.Q5: What if my OPT application is pending after graduation?
You can remain in the U.S. while USCIS processes your request. However, you cannot work until your EAD card arrives.Q6: Can M-1 visa students work on campus?
No. M-1 holders can only apply for practical training after completing their program.Disclaimer: This article provides general information only, not legal advice. Visa rules change frequently. Always consult your DSO or U.S. immigration attorney before making decisions. For official guidance, refer to the USCIS website.
- On-Campus Employment:
-

Student Visa: How to Get It
Dreaming of studying abroad? The thrill of world-class education, cultural immersion, and global career opportunities starts with one crucial document: your student visa. This golden ticket transforms aspirations into reality, but navigating the application maze can feel overwhelming. Whether you’re heading to the U.S., UK, Canada, or Australia, understanding the process is your first assignment.
Understanding the Student Visa Process
A student visa is your legal authorization to reside in a foreign country for educational purposes. Requirements vary significantly by destination, but core principles remain consistent. In 2024, countries like the U.S. (F-1/M-1 visas), UK (Student Route), Canada (Study Permit), and Australia (Subclass 500) dominate international enrollment. The U.S. alone issued over 411,000 F-1 visas in 2023, reflecting a 14% YoY increase according to the Department of State.
Key eligibility pillars include:
- Unconditional admission from an accredited institution
- Financial proof covering tuition + living costs (e.g., $20,000–$70,000 annually depending on location)
- English proficiency (IELTS 6.0+/TOEFL 80+ for most universities)
- Genuine Temporary Entrant (GTE) declaration proving non-immigrant intent
Timing is critical. Begin applications 3–6 months before your course starts. For instance, August intakes typically require visa initiation by March. Delays are common—U.S. consulates currently average 60-day processing times post-interview.
Step-by-Step Guide to Securing Your Student Visa
1. University Admission & Documentation
Secure your acceptance letter first. This triggers institution-specific steps:- U.S. applicants: Receive Form I-20 from your school
- UK applicants: Get a Confirmation of Acceptance for Studies (CAS)
- Canada: Obtain a Letter of Acceptance (LOA)
Essential documents checklist:
✅ Valid passport (6+ months validity)
✅ Passport-sized photos (specifications vary by country)
✅ Academic transcripts and diplomas
✅ Language test scores
✅ Proof of funds (bank statements, scholarship letters, sponsor affidavits). Learn more about navigating financial requirements for international students through our dedicated guide.2. Visa Application & Fees
Complete the official application:- DS-160 for U.S. visas ($185 fee)
- Tier 4 application for the UK (£490 fee)
- IMM 1294 for Canada (CAD 150)
Pay mandatory fees like the U.S. SEVIS I-901 ($350) or UK Immigration Health Surcharge (£776/year).
3. The Visa Interview
This 5–15 minute conversation determines approval. Consular officers assess:- Your academic intentions
- Financial stability
- Post-study plans (emphasize returning home)
Proven interview strategies:
- Practice responses to common questions: “Why this university?” “How will this degree help your home country?”
- Carry original documents in organized folders
- Demonstrate ties to home country (family, job prospects, property)
After approval, passport stamping takes 7–30 days. Track your status via portals like the U.S. CEAC.
Avoiding Common Refusal Traps
Financial inconsistencies cause 23% of rejections according to UK Home Office data. Solutions:
- Maintain funds for 28+ consecutive days before applying
- Explain large deposits with gift deeds or loan sanction letters
- Use education loans from recognized banks
Document errors like mismatched names or expired papers are easily avoidable. Triple-check spellings against your passport.
Interview missteps often stem from inadequate preparation. Role-play with mentors or use university mock-interview services.
Maintaining Visa Compliance
Post-arrival rules are non-negotiable:
- U.S.: Full-time enrollment (12+ credits), limited off-campus work
- UK: Report address changes within 10 days
- Australia: Maintain OSHC health insurance
- Canada: Work ≤20 hours/week during semesters
Violations risk deportation and future entry bans. For insights on adapting to new academic systems, explore our analysis of studying in the UK as an international scholar.
Navigating the student visa journey demands precision, but thousands succeed daily by methodically tackling each phase. Start early, document rigorously, and soon you’ll be boarding that life-changing flight.
Student Visa FAQs
1. Can I work while holding a student visa?
Yes, most countries permit part-time work during studies. In the U.S., F-1 visa holders can work 20 hours/week on-campus. Australia allows 48 hours/fortnight. Always verify specific rules with your host country’s immigration authority to avoid violations.2. How much bank balance is required for a student visa?
Requirements vary by country. For U.S. visas, show 1 year of tuition + living costs ($25,000–$70,000). UK requires £1,334/month for London studies (9 months minimum). Canada demands proof of CAD 20,635/year + tuition.3. What if my student visa application is rejected?
Reapply addressing the refusal reasons. Most countries allow unlimited reapplications. Strengthen documentation, clarify ambiguities, or consider appealing. The UK refusal rate dropped to 8% in 2023 after reapplications with improved evidence.4. Can family members join me on a student visa?
Many countries allow dependents. U.S. F-1 students can bring spouses/children on F-2 visas. Australia permits bringing family members if you’re pursuing a master’s or doctorate. Always declare dependents during initial applications.5. Do student visas lead to permanent residency?
Not directly, but they create pathways. Countries like Canada award Post-Graduation Work Permits (PGWP) allowing 1–3 years of work experience. This often qualifies graduates for skilled migration programs.6. How early should I apply for a student visa?
Initiate applications 3–6 months before your course start date. Processing times peak during summer—U.S. consulates experience 60+ day delays from May–August. Early submission prevents enrollment delays.Disclaimer: Visa regulations change frequently. Always verify requirements with official government sources like the U.S. Department of State or your destination country’s immigration authority before applying.