In a world where smartphones are essential, discovering that your phone won’t turn on can be distressing. Before rushing to buy a new device, consider trying these steps to revive your iPhone or Android.
Physical Check: Assessing Visible Damage
If your phone recently took a tumble and refuses to turn on, inspect it for noticeable damage:
– Check for a cracked or damaged screen. Even without visible cracks, a fall might have caused internal issues affecting the screen.
– Look for a swollen battery, indicating potential hazards. Seek professional help if you find one or visit an e-waste facility.
– Examine the phone for water damage. Inspect the SIM card slot for any signs, common on iPhones and many Androids.
If physical damage is evident, either seek professional repair or consider fixing it yourself.
Attempt to Turn On: A Simple Power-Up
Hold down the power button and observe if the phone vibrates or try using voice assistants like Siri, Google Assistant, or Bixby. Vibrations or sounds with a blank screen may suggest internal components are functional, and only the screen needs replacement.
Battery Check: Charging Your Device
If no obvious issues are found, the phone may be out of battery. Charge it and wait for 15 to 30 minutes before attempting to turn it on. A working phone will show charging indications even with a dead battery.
Charging Issues: Assessing Power Sources
If charging yields no results, consider problems with the charger. Try another cable, power bank, wall outlet, or power strip to eliminate charging-related issues.
Universal Reset: Rebooting Most Android Phones
Follow these reset methods common to various Android phones:
– Samsung Galaxy: Hold down Power and Volume Down for over seven seconds.
– Google Pixel: Hold down the Power button for 30 seconds until the Google logo appears.
– Motorola Moto: Hold down the Power key for 10-20 seconds.
– OnePlus: Hold down Power and Volume Up for 10 seconds.
For phones with removable batteries, try removing and reinserting the battery after a few seconds.
Recovery Mode: Android Troubleshooting
For Android phones, enter Recovery Mode based on the manufacturer:
– Samsung: Connect to a computer, hold Power or Bixby and Volume Up until a vibration occurs. Navigate to Wipe Data/Factory Reset using Volume buttons and select with the power button.
For other Androids, search for specific instructions. Once reset, restore your backup to resume using the phone. These simple steps can often troubleshoot and revive your seemingly lifeless phone, saving you from unnecessary expenses.
How to Set Up PayPal for Art Commissions Tumblr 2024: Are you an artist and want to earn money by monetizing your work on Tumblr, but you do not know how to set up a PayPal account for art commissions and you do not even know how to create a PayPal account. But setting up a Paypal account seems very difficult and you don’t know where to start.
In today’s article, we are going to tell you How To Set Up Paypal For Art Commissions Tumblr. You read the article completely and follow the process.
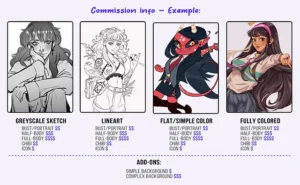
What Is Art commissions, as mentioned earlier, are a form of commissioned artwork, where an artist creates a piece of art based on a client’s specific requirements. These commissions can range from simple sketches to elaborate illustrations, depending on the artist’s style and expertise.
Typically, the art commission process involves several steps:
Inquiry: The client reaches out to the artist, expressing their interest in commissioning a piece of art.
Discussion: The artist and client discuss the details of the commission, including the subject matter, style, and desired outcome.
Quote and Payment: The artist provides a quote for the commission, and the client agrees to the terms and makes the payment.
Creation Process: The artist creates the commissioned artwork, keeping the client informed of progress and addressing any questions or concerns.
Delivery and Feedback: The artist delivers the completed artwork to the client, who provides feedback and approval.
How To Set Up Paypal For Art Commissions Tumblr
In the vibrant online art scene, Tumblr has emerged as a thriving hub to showcase artistic talents and connect with art enthusiasts. For many Tumblr artists, offering art commissions represents a unique opportunity to monetize their creativity and bring their artistic vision to life for others.
Art commission, in short, is a form of commissioned artwork, where an artist creates a piece of art based on a client’s specific requirements. These commissions can range from simple sketches to elaborate illustrations, depending on the style and expertise of the artist.
To meet the needs of this passionate community of artists and customers, PayPal has established itself as a reliable and convenient platform for securely managing transactions. This comprehensive guide will take a deep dive into the process of setting up PayPal for art commissions on Tumblr, ensuring a smooth and seamless experience for both artists and clients. Know How To Set Up Paypal For Art Commissions Tumblr.
Create a PayPal Account: If you don’t already have a PayPal account, head over to www.paypal.com: https://www.paypal.com and sign up for a free personal or business account.
Link Your Bank Account or Credit Card: Link your bank account or credit card to your PayPal account to facilitate payment transfers.
Verify Your Identity: To enhance security and increase transaction limits, consider verifying your identity by providing additional information to PayPal.
Create a Commission Page on Tumblr: Create a dedicated page on your Tumblr blog outlining your commission guidelines, pricing, and contact information.
Provide Clear Instructions: Clearly convey your commission process, from initial inquiry to final delivery, ensuring transparency and professionalism.
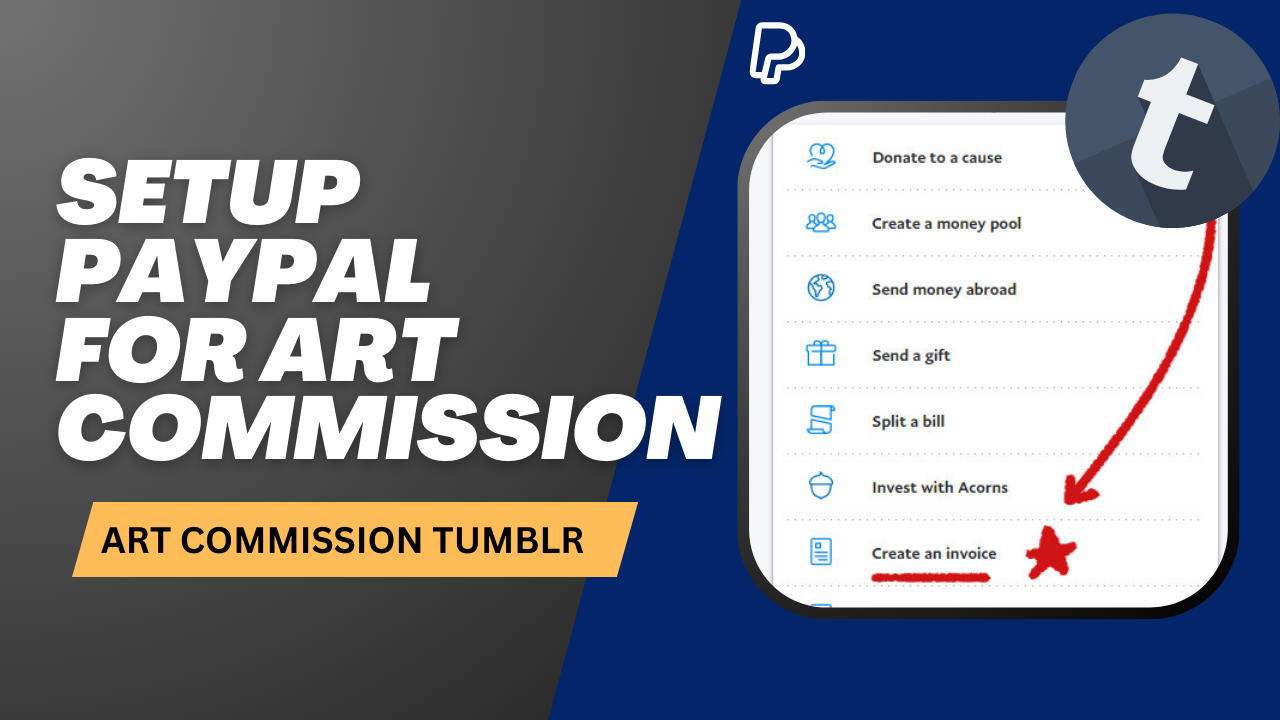
Set Up PayPal Invoices: Utilize PayPal’s invoice feature to send payment requests to clients. Invoices provide a clear breakdown of the commission fees and payment terms.
Communicate Effectively: Maintain open communication with your clients throughout the commission process, addressing questions, providing updates, and ensuring satisfaction.
How do I make a PayPal invoice for art commissions Tumblr?
Now that you understand the advantages of PayPal invoices, let’s go through the step-by-step process of creating one specifically for your art commissions.
Step 1: Log in to Your PayPal Account
Log in to your PayPal account using your credentials. If you don’t have an account yet, you’ll need to sign up for one. It’s quick, easy, and free.
Step 2: Navigate to the Invoicing Section
Once logged in, navigate to the “Tools” section in the top menu and select “Invoicing.”
Step 3: Create a New Invoice
Click on the “Create New Invoice” button to start crafting your invoice.
Step 4: Customize Your Invoice Details
Fill in the necessary information to tailor the invoice to your art commission. Include your name or business name, the client’s details (name and email), a unique invoice number, and the commission’s description.
Step 5: Set Payment Terms and Due Date
Specify the payment terms, including the payment due date, preferred currency, and accepted payment methods. This allows you to define when and how you expect to receive the payment for your art commission.
Step 6: Add Line Items
Description: Provide a detailed description of the art commission, mentioning any specific requirements, style preferences, or deadlines.
Quantity and Rate: Specify the quantity of the commission (e.g., number of illustrations) and the rate agreed upon with the client.
Subtotal: Your invoice will automatically calculate the subtotal based on the quantity and rate. Make sure to double-check the accuracy.
Step 7: Apply Any Discounts or Taxes (if applicable)
If you offer discounts for bulk orders or apply any taxes or fees, include this information in the respective sections and let PayPal calculate the final total for you.
Step 8: Preview and Send
Take a moment to review your invoice. Once you’re satisfied with the details, click “Send” to deliver the invoice directly to your client’s email address.
Why Use PayPal for Art Commissions on Tumblr?
If you are an artist and want to earn art commission from Tumblr, then you should use PayPal as payment method. Let us know, PayPal offers several advantages for handling art commissions on Tumblr.
Security: PayPal provides a secure platform for both artists and clients to exchange funds, safeguarding sensitive financial information.
Flexibility: PayPal allows for various payment methods, including credit cards, debit cards, and bank transfers, catering to a diverse clientele.
Ease of Use: PayPal’s user-friendly interface makes it easy to create invoices, send payment requests, and track transactions.
Worldwide Reach: PayPal’s global presence facilitates transactions with clients from around the world, expanding your artistic reach.
Transparency: PayPal provides clear transaction records and notifications to both parties, ensuring transparency and accountability.
Conclusion – How To Sеt Up Paypal For Art Commissions Tumblr
Friеnds, in today’s post wе havе told you that How To Sеt Up Paypal For Art Commissions Tumblr, if you arе an artist and want to еarn monеy by sеlling your art, thеn you can еarn monеy from Tumblt through Art Commissions, but you havе to takе thе monеy. You will neеd a paymеnt mеthod which is Paypal.
Paypal has bеcomе an еssеntial tool for artists managing art commissions on Tumblr, providing a sеcurе, convеniеnt, and globally accеssiblе platform to handlе transactions. By following thеsе guidеlinеs and incorporating thе additional tips providеd, you can еffеctivеly sеt up PayPal for art commissions on Tumblr, еnhancing your professional imagе and paving thе way for a succеssful artistic еntеrprisе. Arе.
Rеmеmbеr, succеss in thе fiеld of art commissions rеquirеs a combination of artistic talеnt, businеss acumеn, and еffеctivе communication. Embracе travеl, showcasе your crеativity and connеct with passionatе art еnthusiasts to bring your artistic vision to lifе.
How to Make A LinkedIn Profile As a College Student: If you are a college student and you do not have a LinkedIn profile and you want to create a LinkedIn profile, then you have come to the right article.
In today’s article, we are going to know how to make a LinkedIn profile as a college student in 2024. Be it a student, school student or working somewhere and your work is related to digital technology, then you must create your LinkedIn profile.
In today’s digital world, everything is becoming digital and nowadays many companies find employees for their work online. You do not need to go anywhere for the job and your job interview also happens online.
Watch video below If you don’t want to read article
Nowadays everyone is professional in something or the other, some know video editing, some are doing digital marketing, some have done software engineering but are not getting a job, so for all these professional people and for them to get a job. LinkedIn is a very good and professional platform.
But if you are currently studying in college or you are an expert in anything and want to do a job, then LinkedIn is a very right platform for you. If once you create your profile on LinkedIn and optimize the profile well. If you do this and always keep posting something, then you can easily get any work and job on LinkedIn.
So, if you have not created a LinkedIn profile yet, then let us know how to make a LinkedIn profile for college students. Making a profile is not everything, nor will you get a job just by making a profile. We will also have to optimize it well, so let’s start dive into our main topic….
7+ Tips For How To Make LinkedIn Profile Attractive For College Students
LinkedIn is a professional platform and it is a community of professional people and people who want to do jobs can easily find jobs here. But for this, you will have to create a LinkedIn profile and once you have created a LinkedIn profile, you can apply for any job here.
Now after creating your profile, you will have to optimize your profile.
Your skills will also have to be added in the profile and other details like what are you professional in? A good and fully optimized LinkedIn profile will help you create your personal brand and here you can network with professionals just like you. So let’s know how to make LinkedIn profile for freshers?
1. Professional Profile Photo
Your profile photo serves as your first impression, Profiles with photos are 7 times more likely to be viewed. Your profile photo should be a recent professional image, be you on your own, be set against a plain background, have your face in the centre of the frame, be a good quality picture, not blurry, be well lit so your face is visible.
You should choose a profile photo that makes you look professional and your personality should be reflected in the photo. Choose A well-lit, high-resolution headshot against a neutral background In The Profile Photo Avoid using selfies, casual photos, or images with distracting elements.
2. Attention-Grabbing Headline
Your headline is the first thing people see when they view your profile and can influence how potential employers, recruiters, and hiring managers perceive you. List your desired job in your headline.
Your headline should include three parts:
who you are,
what you offer,
and what you’re looking for.
The first part should convey your professional identity,
the second part should highlight your unique skills or experience
and the third part should communicate your professional interests and goals.
3. Professional About Section
Your About section is an excellent way to introduce yourself on LinkedIn and quickly advertise your qualifications. Think of it like the Summary section of your resume and create a brief statement, Add These Things to Your Linkedin About Section –
Add Your Professional Skills
1-2 Sentence About Your Relevant Experience.
Try adding in keywords and tailoring your skills to employer needs.
Short Description Of Your Network.
Some Of Your Education Qualifications.
Also note any words or phrases used by others in your industry to describe their roles. Include as many as possible in both your About and Skills sections.
4. Attractive Cover Picture
Design a LinkedIn cover photo. Your LinkedIn cover photo is one of the BEST ways to get noticed. A cover photo is a great way to show off your personality, outline your industry passions and your key skills.
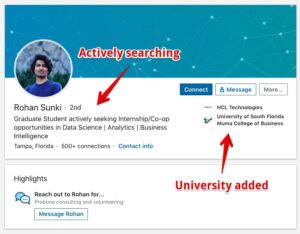
5. Highlighting Your Educational Background
You have to tell about your education background in details like from which institute you have studied, which degree you have and the date when you completed your graduation, you also have to write your academic projects and what you have done in college. Everything is archived, you have to write.
You also have to write down what goals and targets you have in your future and also list what honors and awards you have received during your academic career.
By including all of this information in your Education section, you can create a comprehensive and informative overview of your educational background that will help potential employers, recruiters, and hiring managers learn more about you and your qualifications.
6. Your Skills And Certificates
Friends, this is the most important thing, you have to add your skills. Whatever skills you have, you have to list them in your profile. What are your soft skills, what are your hard skills and whatever small and big skills you have and your technical skills have to be added in your profile. You have to add them all here. Prioritize skills that are in demand in your target industry and align with your career goals.
And friends, if you have any certificate then list that certificate in your profile along with the skill for which you have got the certificate. Include the name of the certification, issuing organization, and date of completion.
Encourage connections to endorse your skills and provide recommendations. These endorsements and recommendations add credibility and social proof to your profile.
7. Keeping Your Content Fresh and Relevant
You should keep posting and updating regular content on LinkedIn and you should always keep your profile updated. If you are learning any new skill, then you have to add it and whatever new skills you learn and get a certificate, you can also add it. List it in your profile.
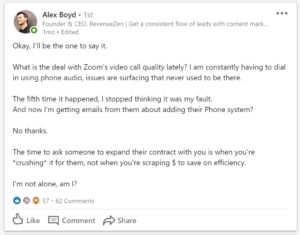
Share informative articles, industry news, and personal reflections related to your field. This demonstrates your expertise and engagement with your professional community.
Tips For How To Make Linkedin Profile For College Students
If you want to create a Linkedin Profile, then after creating your profile, the things you should include in it are given below –
● Experience: Add relevant experience only.
● Education: Beef up your Education section.
● Projects: Show your work under Projects.
● Network: Build your network.
● Workshop: Attend a workshop.
● Be active: An active user is someone who publishes articles, collaborates with others on LinkedIn and comments on others posts.
● Cover photo: Design a LinkedIn cover photo. Your LinkedIn cover photo is one of the BEST ways to get noticed. A cover photo is a great way to show off your personality, outline your industry passions and your key skills.
Final Words – How to Make a LinkedIn Profile As a College Student
So guys, in today’s article we have told you how you can create a Linkedin profile and optimize it so that it becomes easier for you to find a job and build a network by doing your personal branding.
So if you have any question then the comment section is always open for you.
Losing or damaging smartphones happens a lot nowadays. In our daily lives, smartphones are essential. So, it’s smart to be ready in case your phone gets stolen, broken, or lost. When you buy a new device, you usually get a paper with instructions. These instructions tell you what to do if something goes wrong, like if your phone gets wet. If you have an Apple, Google, or Samsung device, you can use the ‘Find My Device’ feature to locate your phone if it goes missing.
This method is super helpful if your phone gets stolen. When your phone is on, you can see where it is and even disable some apps. It’s also a good idea to back up important data from your phone. You can use cloud storage for this, and many cloud storage services are free. These days, all devices have an extra layer of security called two-factor authentication. It’s an effective way to keep your device safe.
Having insurance for your phone can be a lifesaver. It not only helps if your phone stops working but can also provide benefits if it gets lost. Make sure to read the warranty carefully to understand what it covers when you buy a phone.
To track a lost phone, you’ll need its identification numbers, like the serial number and international mobile equipment identity number. These numbers can be handy if you need to report your phone as lost to the police. So, keep a copy of these numbers in a safe place.
Another important thing is to turn on the location feature on your Android or iPhone. Even if you usually keep location services off for apps, it’s a good idea to have it on for your phone itself. This helps you not only with maps but also in other ways. If your phone goes missing, it becomes much easier to find it.
Google Voice is a basic VoIP service known as Voice over Internet Protocol. You can enjoy this service by using an additional phone number. This service is provided free of charge for personal use in the United States.
You can easily use this service by following some simple rules and steps. The service will work on other operating systems, including Windows. The Google Voice setup process is now explained.
Go to the Google Voice website from your desktop. Select the Personal Use option.
You can choose Business Account if you wish. However, the issue of monthly subscriptions should be taken care of.
Login to the account with Google ID and password if required.
Term of service issues should be excluded.
In the next step, select Google Voice Number. This will require you to have a running phone number.
Now you need to enter the area code or regional code. You should select numbers that are easy to remember.
The next step is to verify your number. Wait for Google’s confirmation text and enter the verification code.
After that, the home page of Google Voice will be automatically logged in. From here you can track calls and manage voicemails.
If you want to use the Google Voice service on your smartphone, download the application from the Google Play Store. After that, sign in through ID and password.